

-
Hole #1
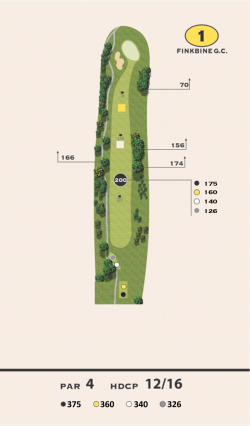 ORIGINALLY HOLE 10 and was changed to Hole 1 at the start of the 2020 season. Tough driving hole to start the round. Fairway slopes severely left to right. Below the hole is a must, which you might want to get used to hearing!
-
Hole #2
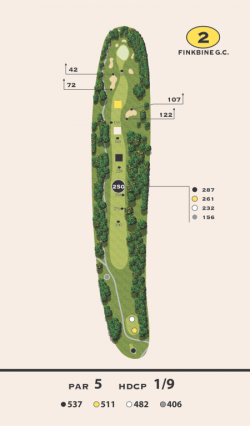 Straight away Par-5. Hitting the fairway is crucial to making birdie. Make sure lay-up shot avoids fairway bunkers on left and right. Also, pay attention to pin placement on this green.
-
Hole #3
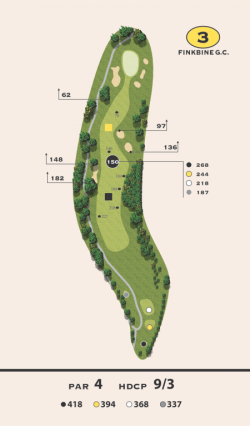 Long hitters may need 3-wood off this tee. Once again, pay special attention to pin placement as this green is 40 yards long.
-
Hole #4
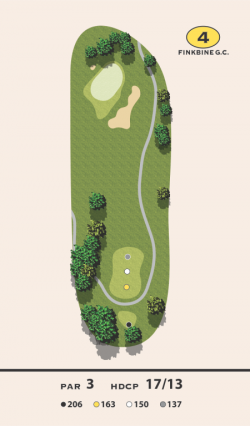 Good Par-3. Long or left is jail. A good tee shot can net you a birdie here.
-
Hole #5
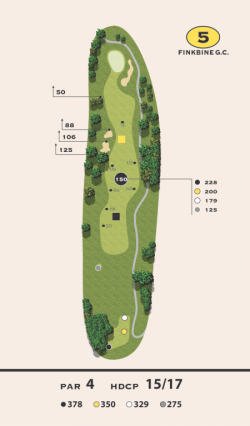 One of the easiest holes on the course. Hit driver down the middle to leave short iron to this back to front sloping green. A definite birdie opportunity.
-
Hole #6
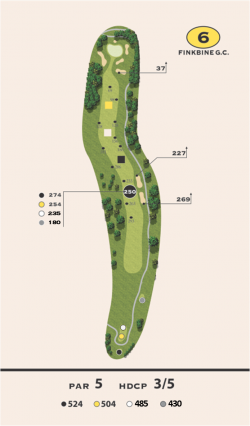 Great Par-5. Hit it down the left side to give yourself the best angle at layup, or an attempt at the green for the long hitters. Five bunkers protect this green on all sides, and the green has very severe slope from back to front.
-
Hole #7
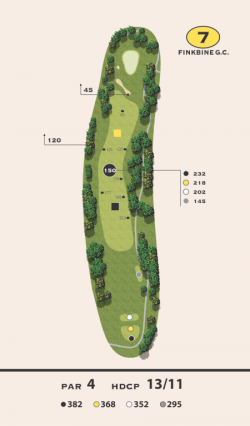 Position is key off the tee. Driver is too much club for some long hitters unless you cut off the corner. Back to front sloping green again so keep it below the hole.
-
Hole #8
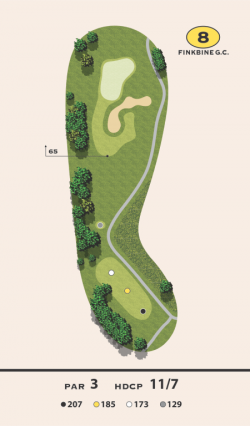 Take enough club to clear the front bunker, and then hope to leave with par on this great Par-3.
-
Hole #9
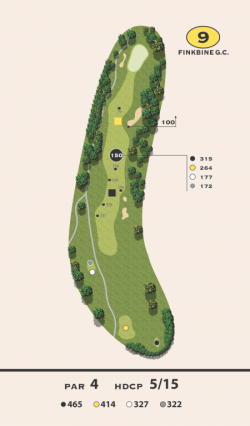 Bring your game to this hole. Drive needs to be hit hard up the left side to avoid bunkers on the right side. Second shot will be a long iron to a left to right sloping green. A par here is a great score.
-
Hole #10
 Keep it down the left side to avoid fairway bunker on right. Green slopes severely from back to front, so try and keep it below the hole for your best birdie chance.
-
Hole #11
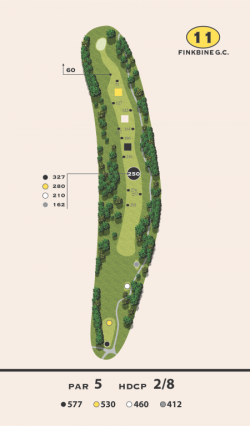 Basic Par-5. Only the very long hitters can reach this green in two. For the rest, lay-up properly for best angle to pin.
-
Hole #12
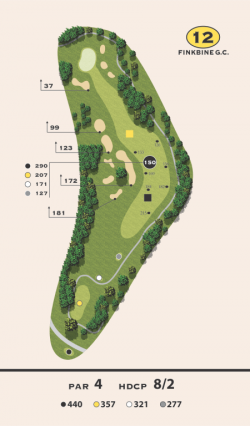 Great driving hole. Take enough to carry the bunker, but not too much to get through the fairway. You will then have a mid-iron straight up the hill to a well bunkered and mounded green. Long is a sure double-bogey or worse.
-
Hole #13
 Our signature island green hole. Obviously not much room for error here. Will generally play a club to two clubs less than yardage listed. Keep it dry, make your par, and head for the next tee.
-
Hole #14
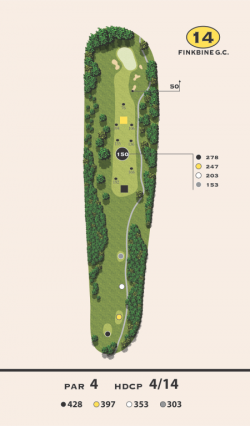 Another great Par-4. Let loose with driver from the tee to leave a mid to long-iron approach to one of the toughest putting greens on the course. Four is a good score.
-
Hole #15
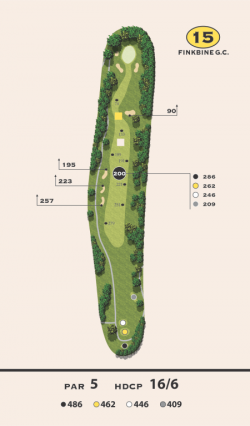 Time to take a break with this easy Par-5. Long hitters will have iron in to this hole and a chance at eagle. But beware, trouble lurks everywhere around this green.
-
Hole #16
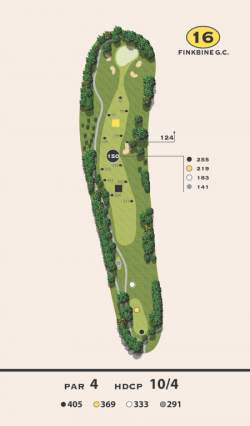 Driver and mid-iron is the call for this basic Par-4. The games begin on this green. Anything less than a three putt is acceptable.
-
Hole #17
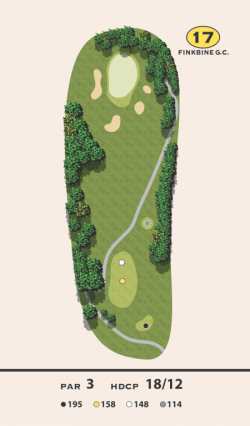 Good Par-3. Anything hit to left half of green will likely roll off the green. Check pin placement, as this green is 35 yards deep.
-
Hole #18
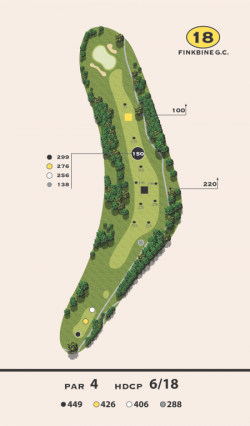 Great finishing hole. Cut the corner slightly on this dogleg left so you don’t have 200-plus into the green. Long irons and some woods into this green are the norm. Par is a good score.
Maps by Bench Craft Company | www.BenchCraftCompany.com